Quick Start: Install Voyant API with Windows
Install and launch the Voyant API on your Windows system.
1. Install Voyant API
1.1 Installation
Download and extract voyant-api-windows-vX.X.X.zip from voyant-sdk/releases/latest.
Move the extracted folder to your preferred location (e.g., C:\Users\YourName\voyant-api-windows-vX.X.X)
No installer is required.
1.2. Verify
Double-click voyant_visualizer.exe (or run from a command prompt) and confirm that the application main window appears.
2. Connect to Carbon 30 Sensor
Your host machine needs a static IP address set to the same subnet as the sensor. This section details how to configure the IP for your Windows system. Do this process once per machine.
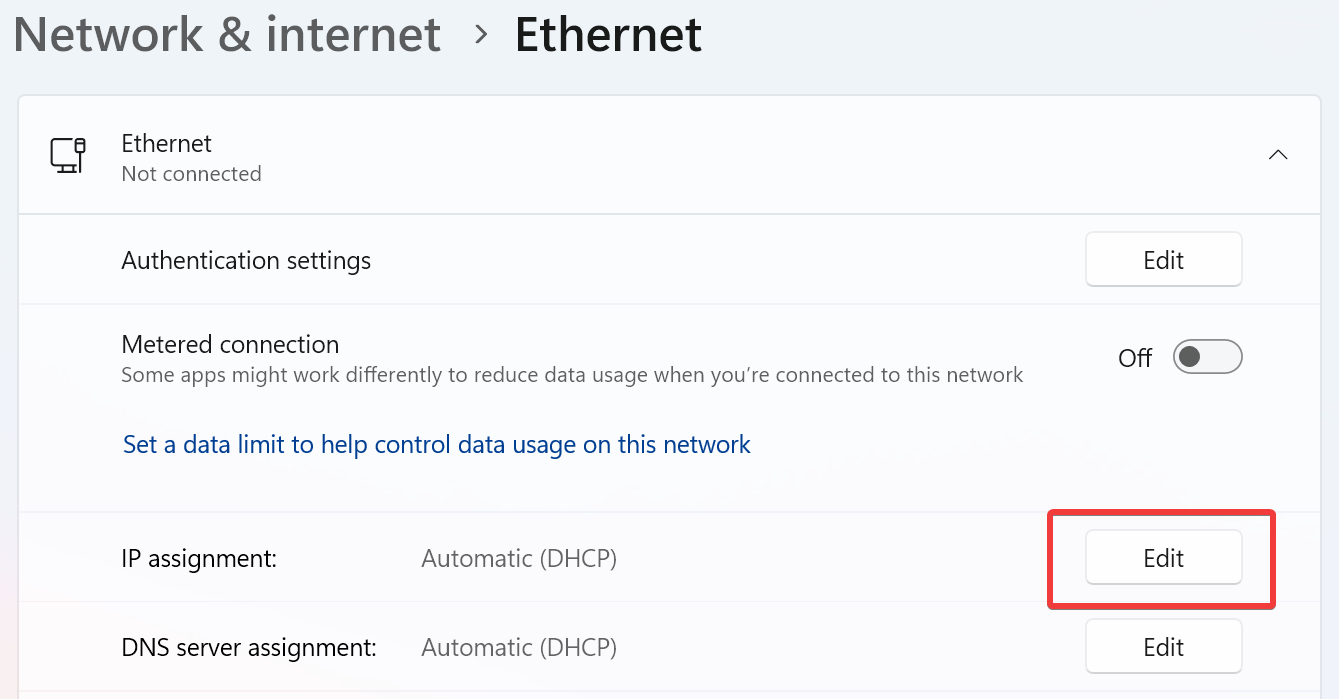
1. Navigate through Settings → Network & Internet → Ethernet
2. Click your Ethernet adapter → Edit next to the IP assignment:
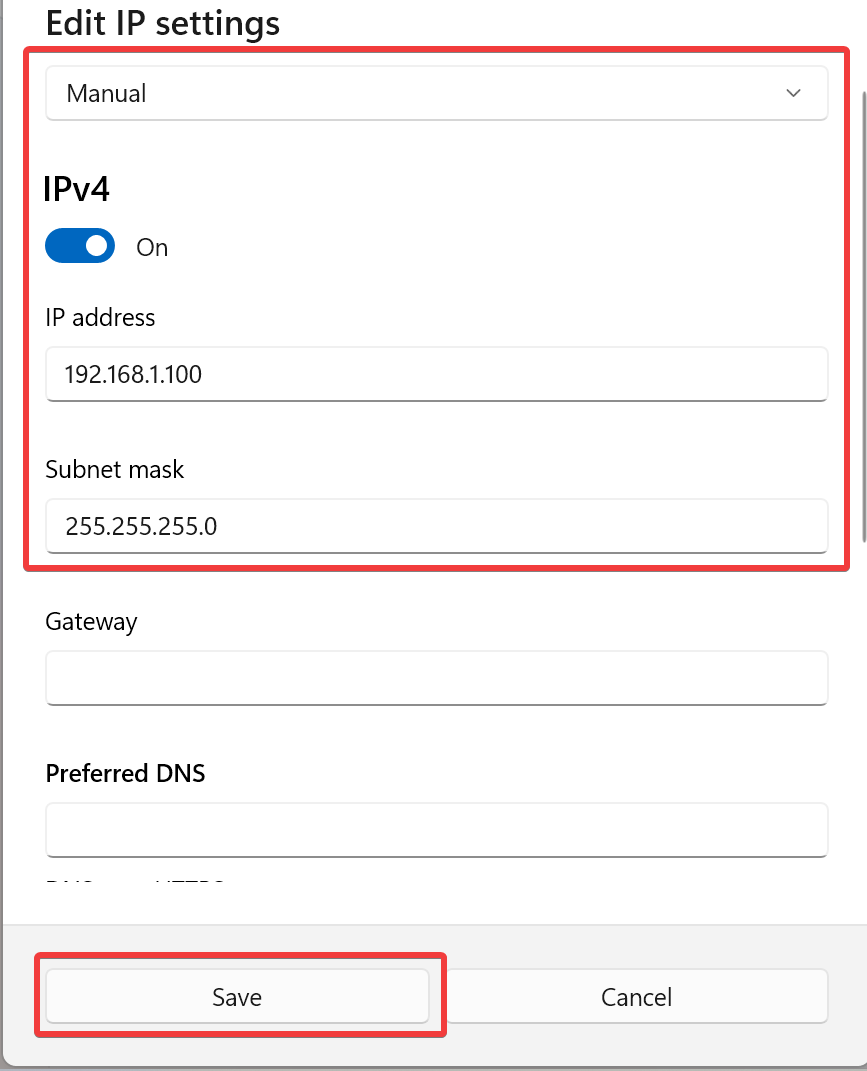
3. Switch to Manual, toggle IPv4 on, and set:
- IP address:
192.168.1.100 - Subnet mask:
255.255.255.0 - Gateway: Leave blank
4. Click Save:
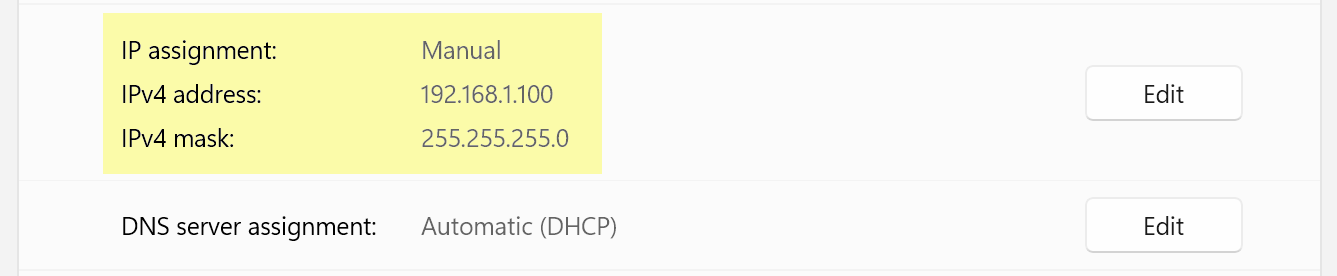
5. Confirm that Manual IP has been properly set as below:
3. Start Carbon 30
You are now ready to start your Carbon 30 sensor and begin collecting point cloud data.
Double-click voyant_visualizer.exe to launch the Voyant Visualizer.
Next, see the Verify Sensor Connection page for information on connecting to your Carbon 30 sensor and streaming data.