Quick Start: Install + Connect on Ubuntu
Install the Voyant API and connect your Carbon 30 on Linux.
Prerequisites:
- Ubuntu LTS releases 22.04, 24.04, or 26.04 (x86-64)
- ARM64/aarch64: Raspberry Pi OS Bookworm (e.g. Raspberry Pi 5), NVIDIA Jetson JetPack 6, or Ubuntu 22.04+ arm64
- Administrative
(sudo)access
Note: the compiled
.debtools require a recent OS (Raspberry Pi OS Bookworm / JetPack 6 or newer on ARM). On older ARM systems such as Raspberry Pi OS Bullseye or Jetson JetPack 5, you can still access the API through the Python bindings, whose wheels support those releases — but the compiled GUI tools (e.g. the Voyant Visualizer) are not available there.
1. Install Voyant API
1.1. Installation
Download voyant-api-debian-*.tar.gz from voyant-sdk/releases/latest.
Now extract and install the Debian packages with the command line.
$ cd Downloads/   # or location of downloaded tarball
$ tar -xzf voyant-api-debian-*.tar.gz --one-top-level
$ cd voyant-api-debian-*/
$ sudo apt update && sudo apt install ./voyant-api*$(dpkg --print-architecture).deb
1.2. Verify
Verify the install by running
$ voyant_visualizer
and confirm that the application main window appears.
Software rendering (no GPU)
If the Visualizer window fails to appear on a host without a supported GPU (e.g. a Raspberry Pi 5), force software (CPU) rendering by launching it with:
$ LIBGL_ALWAYS_SOFTWARE=1 voyant_visualizer
It works, but expect heavy CPU use; a machine with a GPU is strongly preferred. See The Visualizer is the heavy tool for guidance on host selection.
2. Connect to Carbon 30 Sensor
Your host machine needs a static IP address set to the same subnet as the sensor. This section details how to configure the IP for your Linux system. Do this process once per machine.
💡 If no wired connection appears in Network settings, make sure the sensor is powered on and the Ethernet cable is connected at both ends, then re-check.
Use the Network Manager GUI.
These configuration settings are also possible in command line with analogous instructions.
Note: the screenshots below are from the Ubuntu (GNOME) network UI. On Raspberry Pi OS, Jetson, or other distributions the interface looks different, but the required IP settings (a static IP on the sensor’s subnet) are the same.
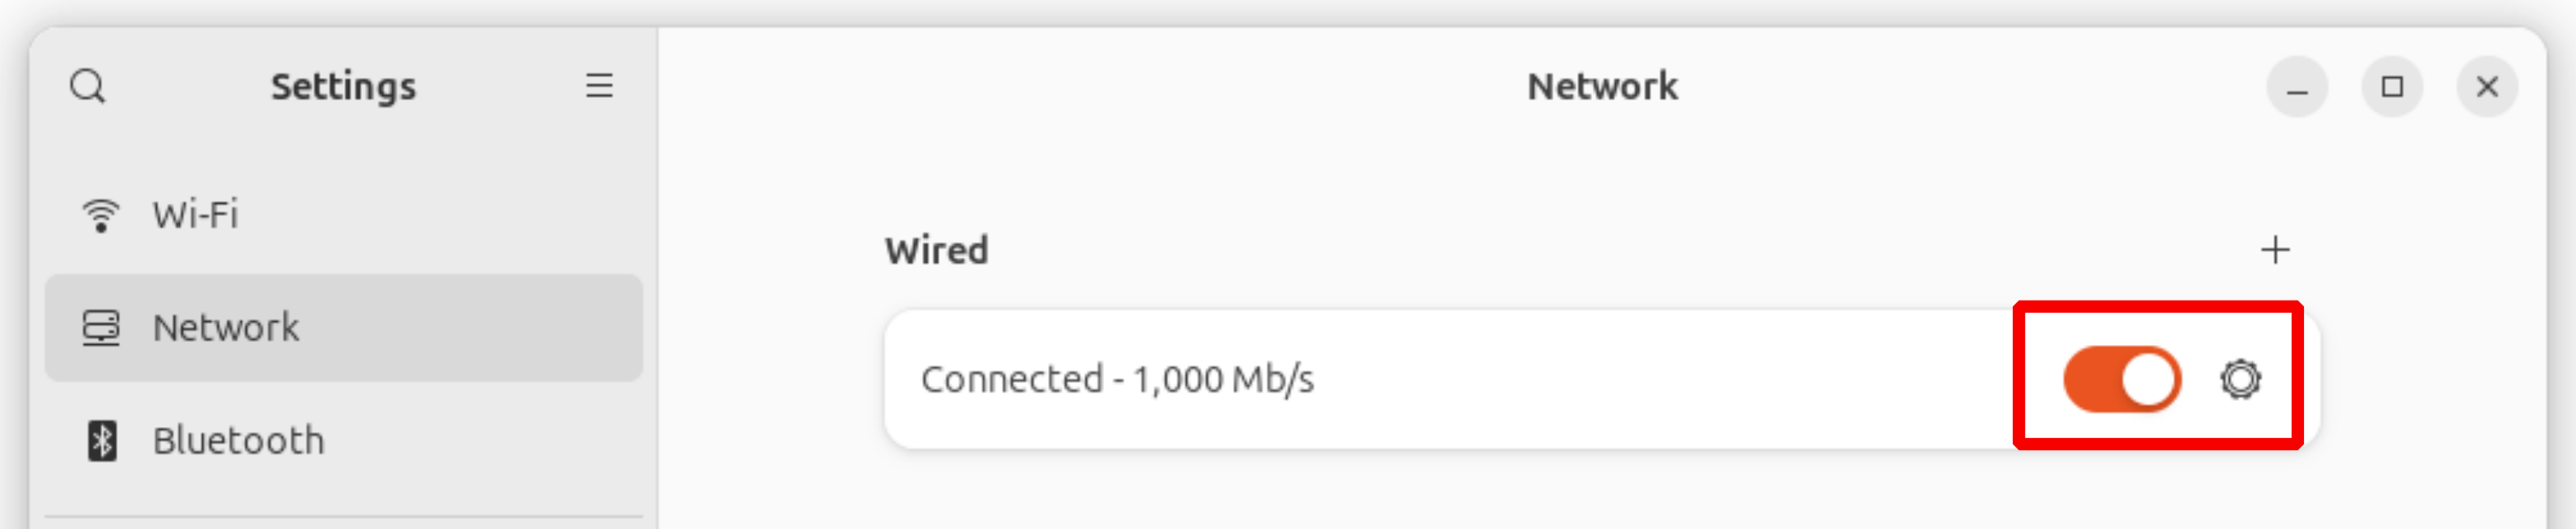
1. Open Settings → Network → Wired (or click the network icon in the top bar).
Note: If using Ubuntu 22.04, the Ethernet connection may not show on the Network Settings page after initial connection. In this case, see the solution in our Connections page before resuming with this procedure.
2. Click the gear icon ⚙️ next to your Ethernet Connection:
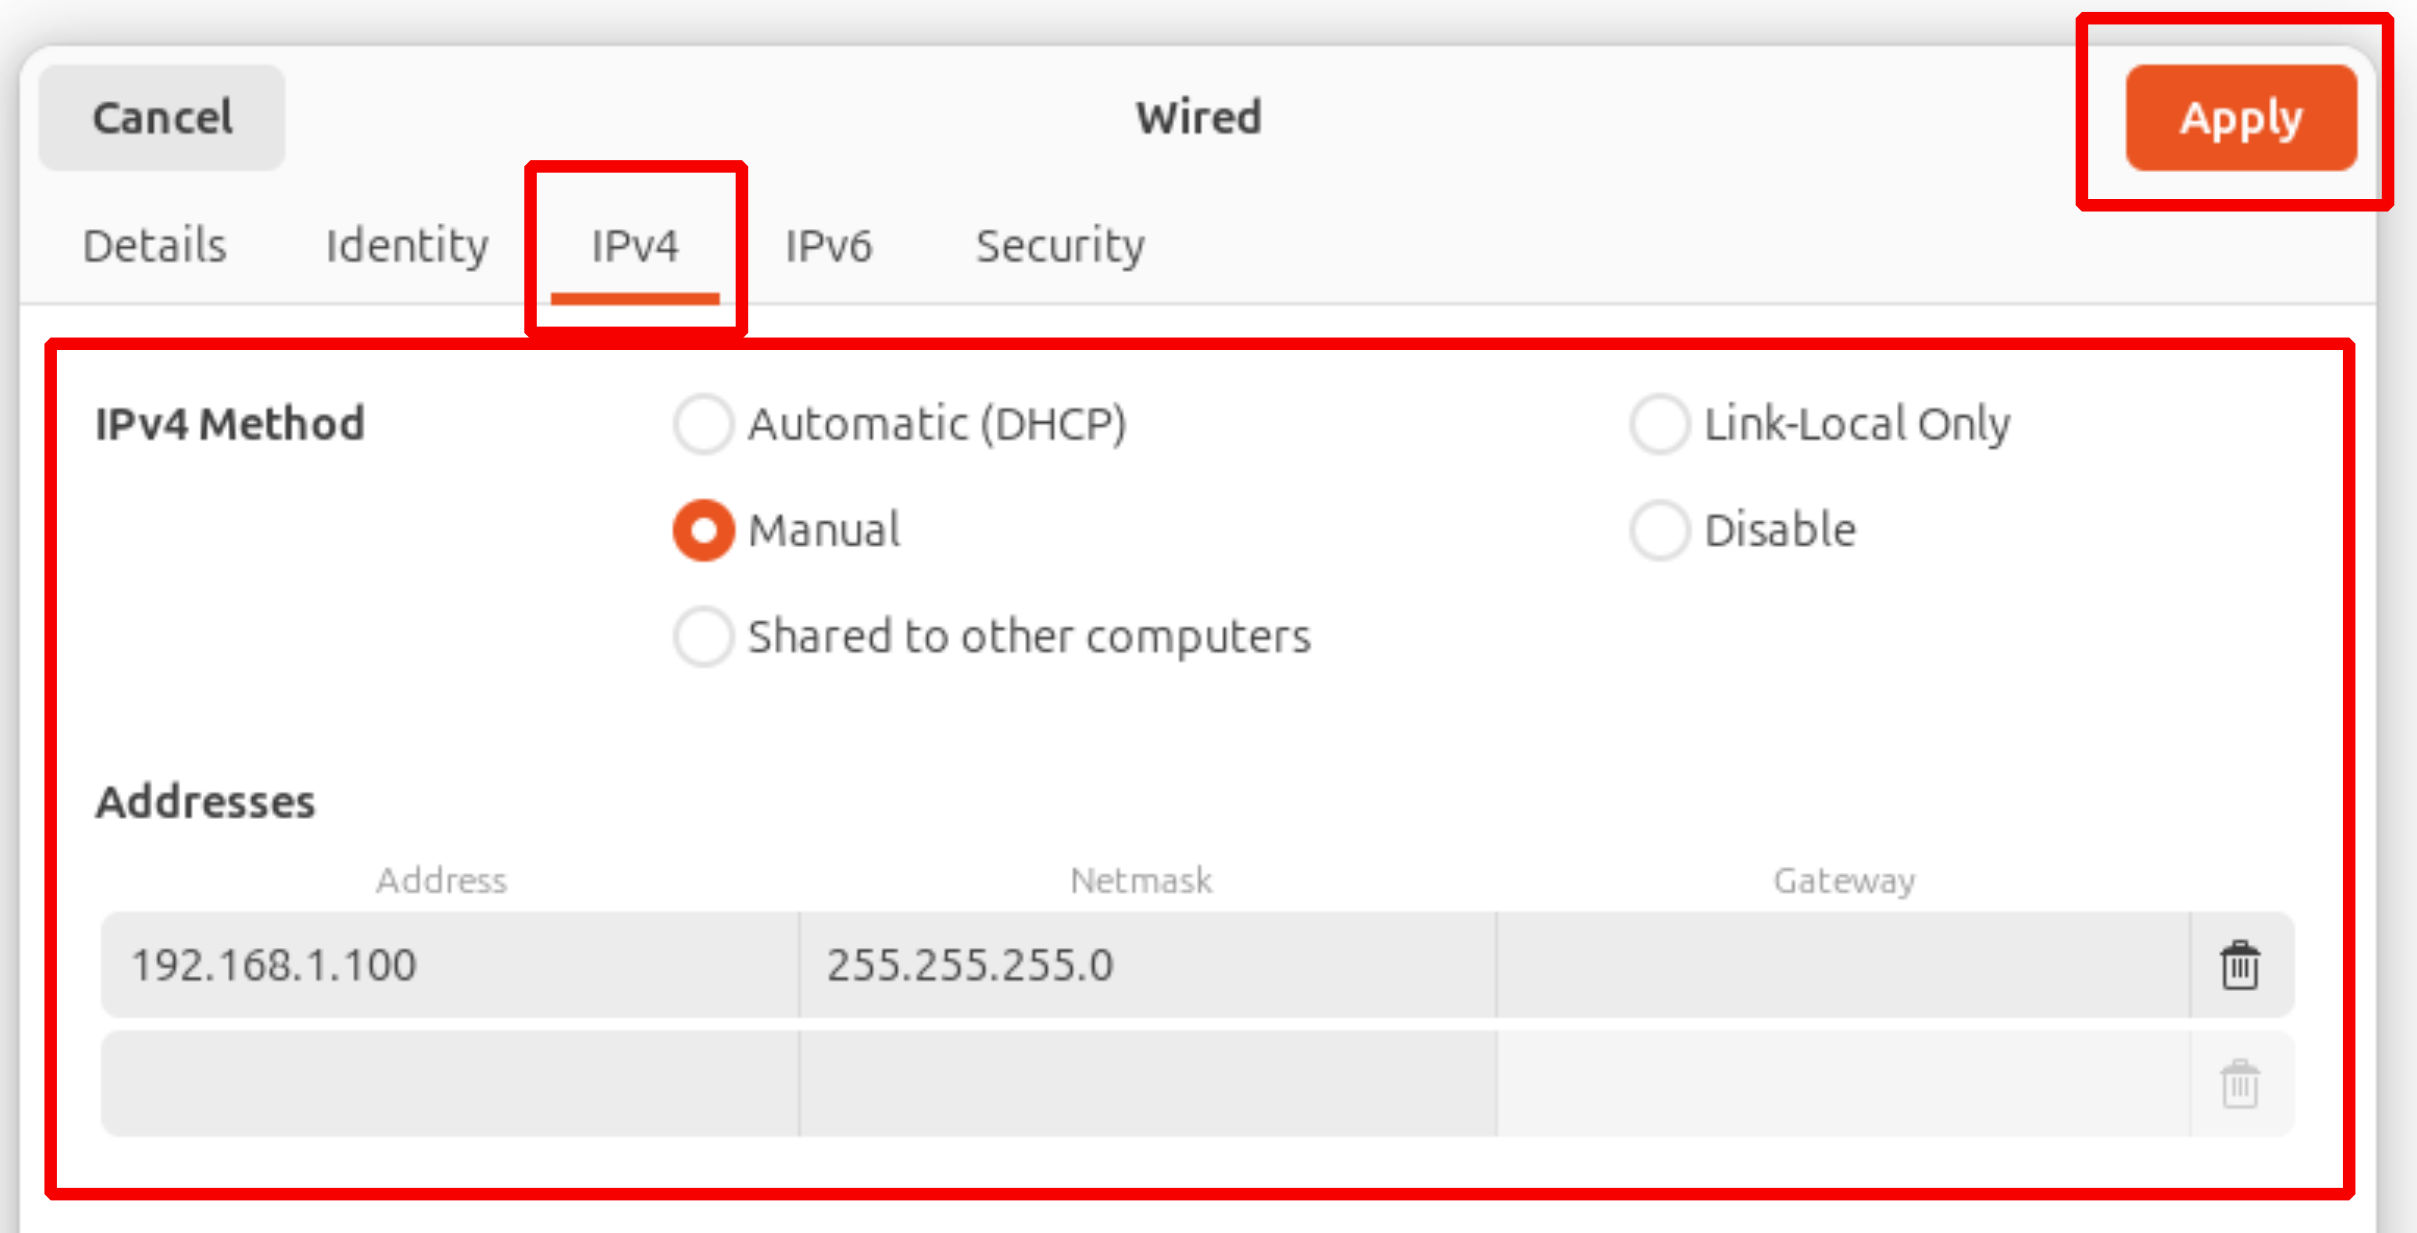
3. Go to the IPv4 tab.
4. Set method to Manual and enter:
- Address:
192.168.1.100 - Netmask:
255.255.255.0 - Gateway: Leave blank
5. Click Apply, then toggle the connection off and back on:
3. Start Carbon 30
You are now ready to start your Carbon 30 sensor and begin collecting point cloud data.
Run $ voyant_visualizer from a terminal to launch the Voyant Visualizer.
💡 For a reliable stream, select the Performance power profile before connecting — a lowered CPU clock can cause dropped data (headless:
powerprofilesctl set performance). See Power mode.
See the Verify Sensor Connection page for information on connecting to your Carbon 30 sensor and streaming data.