Quick Start: Verify Carbon 30 Connection
Quickly connect and access your Carbon 30 LiDAR sensor and its data with the Voyant Visualizer.
With correct installation and network connection, you are now ready to use the Voyant Visualizer with your Carbon 30 LiDAR sensor.
The following image labels relevant information on the visualizer and showcases some of its configurable features.
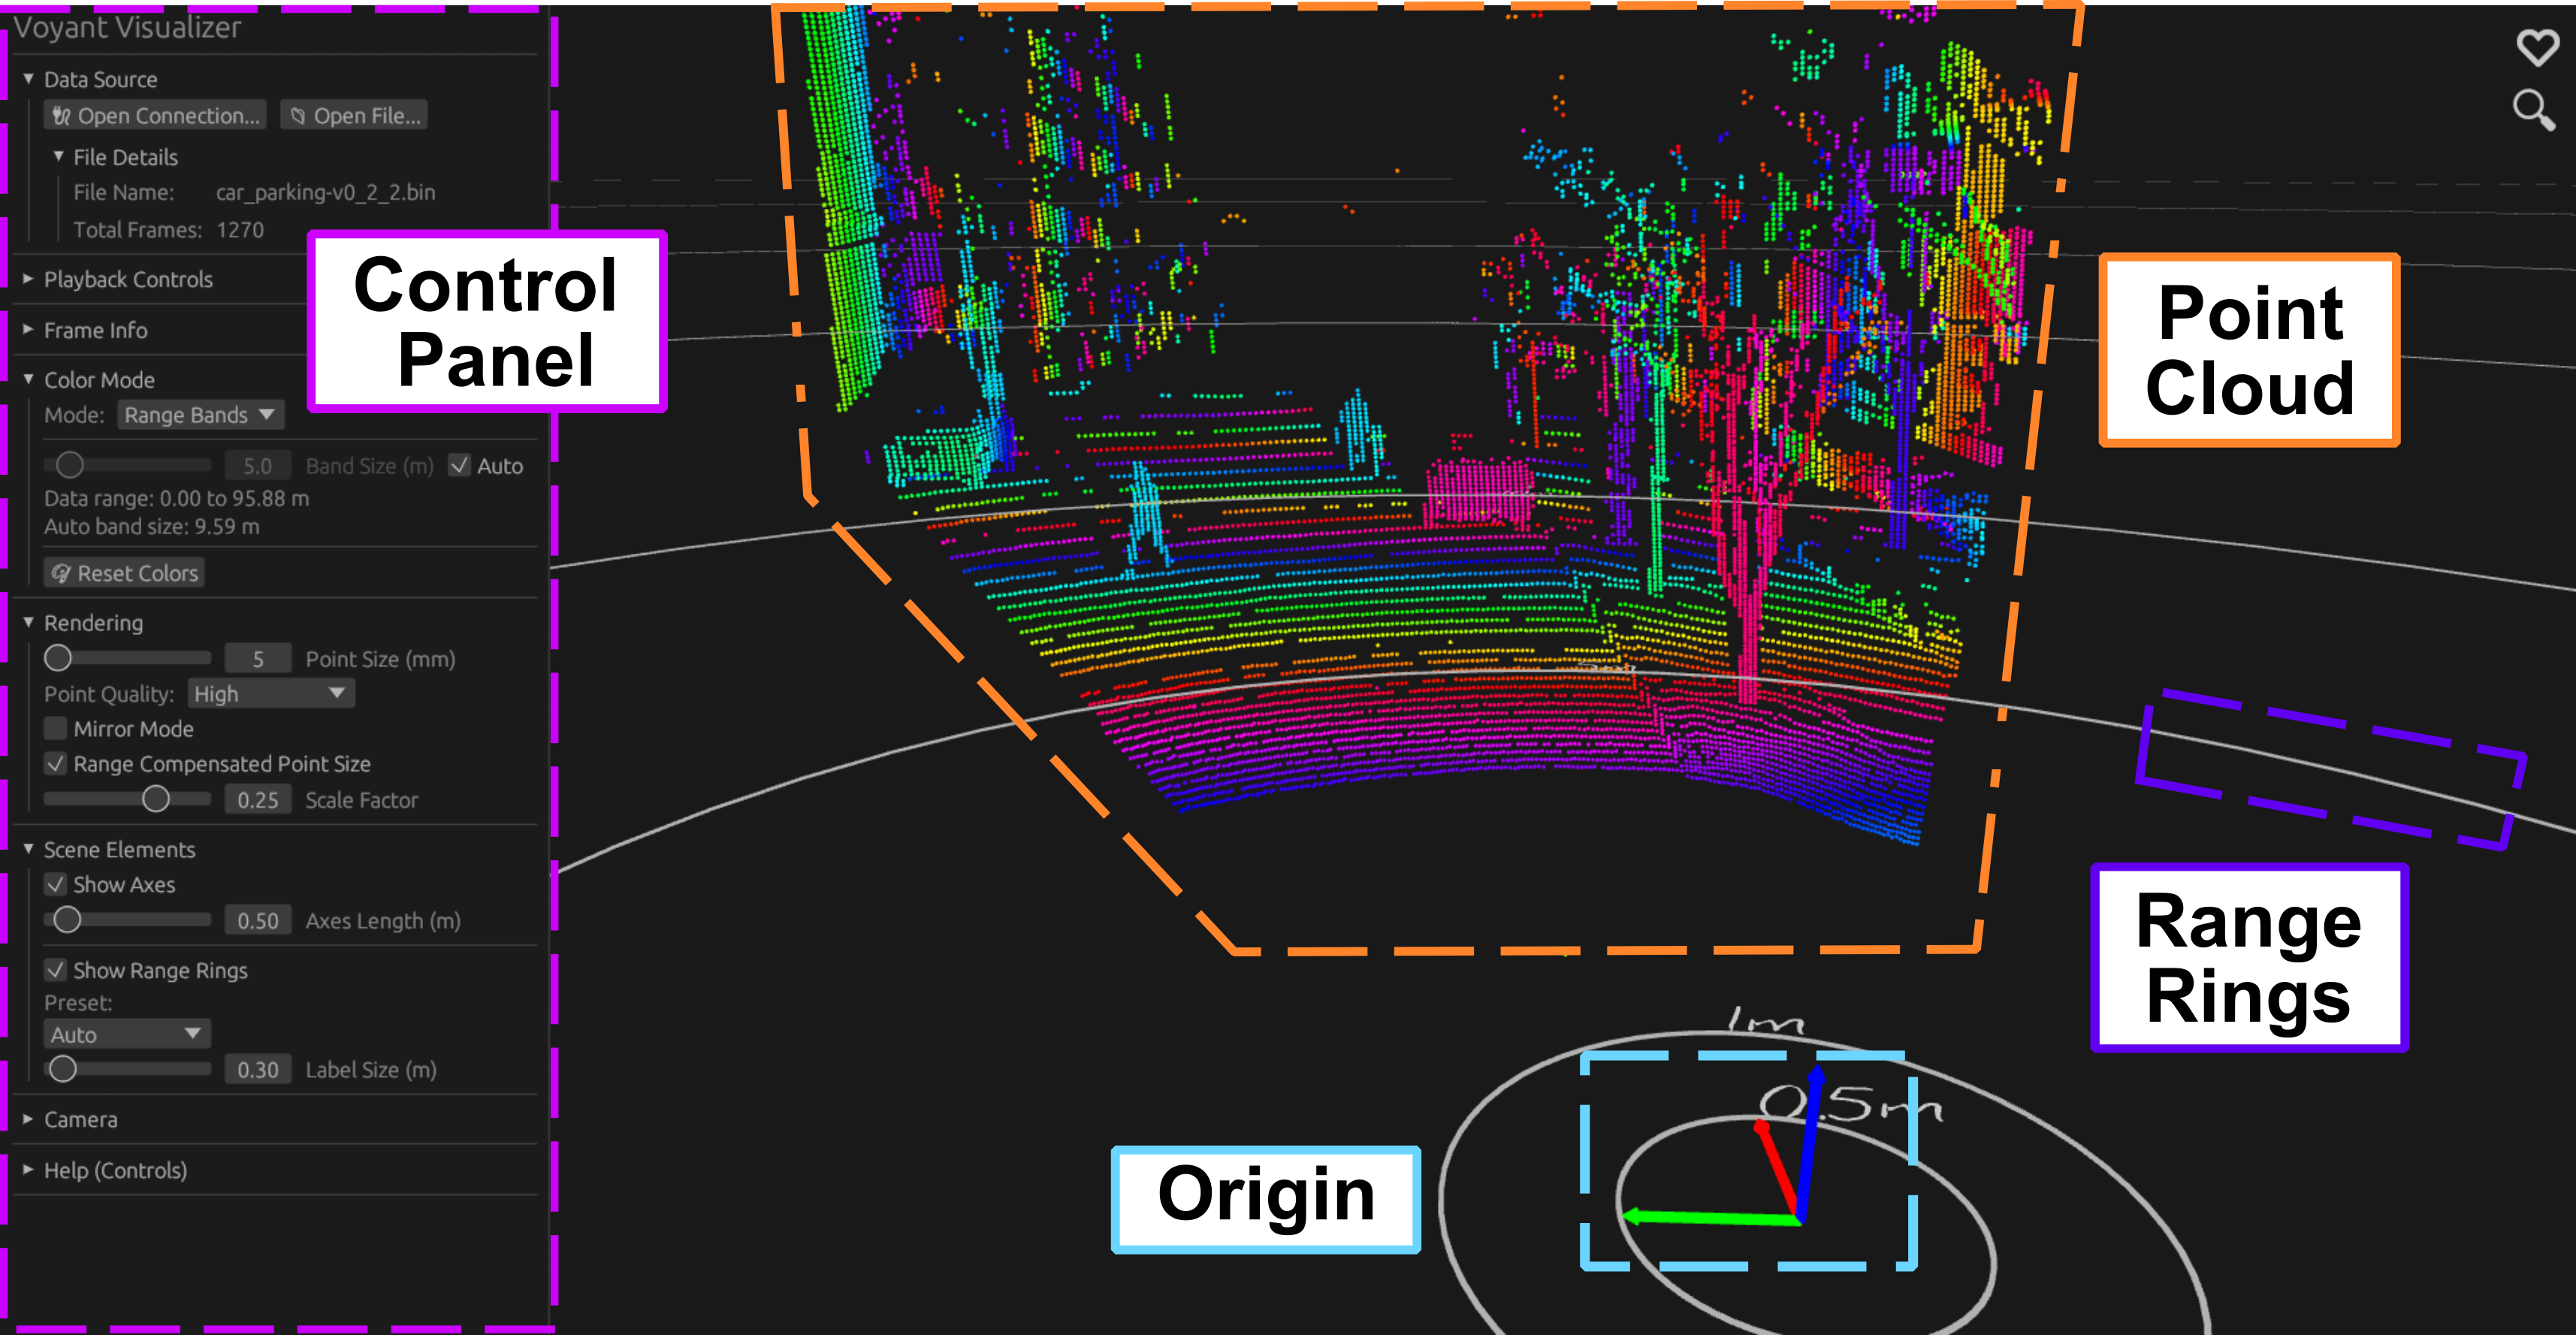
The Voyant Visualizer. Key attributes and features are highlighted. Data from car_parking-v1_0_0.vynt dataset.
The following parts walk you through loading a recording or connecting to a live sensor, then confirming a healthy connection. To interact with and explore the point cloud, continue to the Voyant Visualizer Guide.
Data Sources
The Visualizer supports two ways to view data:
1. Playback (Open File): Load a previously recorded point cloud dataset.
2. Live Streaming (Open Connection): Connect directly to a Voyant sensor.
The Data Source panel at the top of the control panel on the left of your screen lets you choose between these options.
If you are using the Visualizer for the first time, it is recommended to start with a recorded dataset. Voyant provides two datasets for download in the Open File (Playback) subsection below.
1. Open File (Playback)
Playback mode allows you to explore previously recorded data.
Click Open File… and select a .vynt recording.
You will need a Voyant .vynt data file, either:
- Downloaded from our sample datasets:
- car_parking-v1_0_0.vynt (540 MB)
- people_walking-v1_0_0.vynt (484 MB)
- Recorded from within the Visualizer.
Use the Playback Controls panel to play, pause, restart, adjust playback rate, loop, and scrub through frames using the progress slider. Note: the Space key can be used to toggle play/pause of data.
2. Open Live Connection
Live mode connects directly to a Carbon 30 LiDAR sensor.
Tip: Use Playback mode first to familiarize yourself with the Visualizer interface before connecting to live data.
Click Open Connection… to connect to a live sensor.
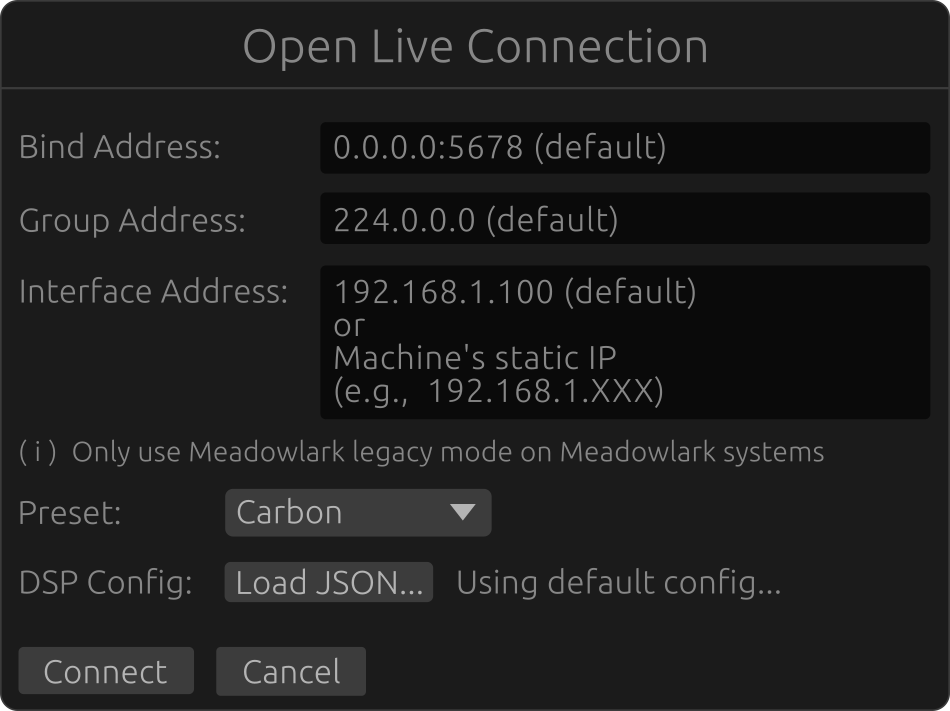
Example of properly configured Live Connection page.
The default settings work for most cases:
- Bind Address:
0.0.0.0:5678 - Group Address:
239.255.48.84 - Interface Address: default
192.168.1.100or Your machine’s static IP (e.g.192.168.1.XXX)
The Group Address is the multicast group the client joins. You provide it the same way regardless of how the sensor streams (see Connection Transport below).
Maintain the Preset: Carbon setting for use with your Carbon 30 LiDAR sensor.
Connection Transport (Advanced)
The defaults above connect a single client by unicast — the sensor replies only to your machine. This is the most robust option and delivers reliably even when your host has several active network connections (e.g. wired plus Wi-Fi). Two controls in the dialog let several machines share one sensor:
- Stream transport — Unicast (single client) is the default. Choose Multicast (shared) to have the sensor stream to the group address so several clients can view it at once.
- Observer only (passive) — receive the point stream without sending anything to the sensor (no SDL commands, time-sync, or comms-health). Use this when another client already owns the sensor. Exactly one connected client should be the primary (non-observer); every other should be observer-only. Observers only receive data when the primary is using multicast.
To select the transport from the command line instead, see the Connections page.
If you have a custom configuration for your environment, you can upload a JSON file in the DSP Config setting. This is optional, as the live connection is set with a default configuration.
Leave the Diagnostic mode checkbox off for normal use — it is for recording a support bundle when Voyant support asks for one.
When your settings are properly configured, click the Connect button to begin viewing live data from your Carbon 30 sensor.
Open the Connection Details menu to see the associated addresses of the Carbon 30 sensor that match those input when connecting.
Confirm a Healthy Connection
Once connected, click the heart icon in the top-right corner to open the Sensor Health panel and check two key indicators.
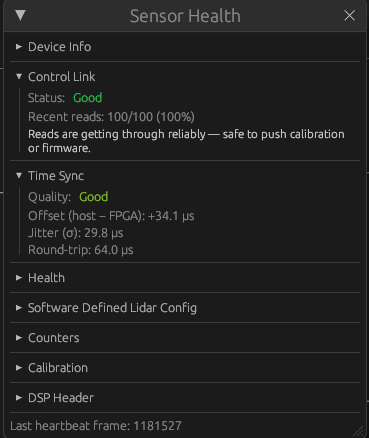
The Sensor Health panel with the Control Link and Time Sync sections expanded.
Control Link is a basic connectivity check on the host → sensor command channel — the link used to communicate with the sensor (for example when applying SDL parameters, background-noise calibration, or a firmware update). A colored ↔ indicator below the heart icon mirrors this status at a glance.
- Good — reads are getting through reliably.
- Warning — some reads are failing; the link is flaky.
- Bad — reads are not getting through.
- Unknown — no recent measurement. This is expected while the sensor is streaming a point cloud: the probe pauses so its register reads don’t contend with the data stream, and resumes (returning to Good) once the sensor is idle. Also shows when not connected.
If the Control Link is not Good while the sensor is idle: power-cycle the sensor while leaving the connection up. You may need to reconnect once the sensor has finished booting. (An Unknown reading during live streaming is normal — see above.)
Time Sync reports the quality of host↔FPGA clock synchronization, which keeps frame timestamps aligned between your machine and the sensor. Unlike the Control Link, it runs regardless of the sensor’s operating state — it stays measured whether the sensor is idle or streaming.
- Quality — Excellent, Good, Fair, Poor, or Unsynced. A healthy connection sits at Good or better, with the offset typically well under ~100µs.
- Offset (host − FPGA), Jitter (σ), and Round-trip — the measured clock offset, its standard deviation, and the sync round-trip time, all in microseconds. When the quality is Unsynced, these read
—.
Seeing
DSP sequence droporRamp dropwarnings, or dropped points? First confirm the host is in a performance power mode — a lowered CPU clock starves the single-core pipeline. On Linux, also raise the kernel UDP receive buffer, which usually eliminates the rest — see Raising the UDP receive buffer.
✅ You have successfully started using your Carbon 30 LiDAR sensor with Voyant’s API and Visualizer!
Next, see the Voyant Visualizer Guide to learn more about how to begin interacting with the Voyant point clouds, including configuring Software Defined LiDAR (SDL) parameters, streaming and recording live data, visualizing different metrics of the point cloud, and saving raw files.