Quick Start: Install + Connect on Windows
Install the Voyant API and connect your Carbon 30 on Windows.
1. Install Voyant API
1.1 Installation
Download and extract voyant-api-windows-vX.X.X.zip from voyant-sdk/releases/latest.
Move the extracted folder to your preferred location (e.g., C:\Users\YourName\voyant-api-windows-vX.X.X)
No installer is required.
1.2. Verify
Double-click voyant_visualizer.exe (or run from a command prompt) and confirm that the application main window appears.
2. Connect to Carbon 30 Sensor
Your host machine needs a static IP address set to the same subnet as the sensor. This section details how to configure the IP for your Windows system. Do this process once per machine.
💡 If no Ethernet adapter appears in these settings, make sure the sensor is powered on and the Ethernet cable is connected at both ends, then re-check.
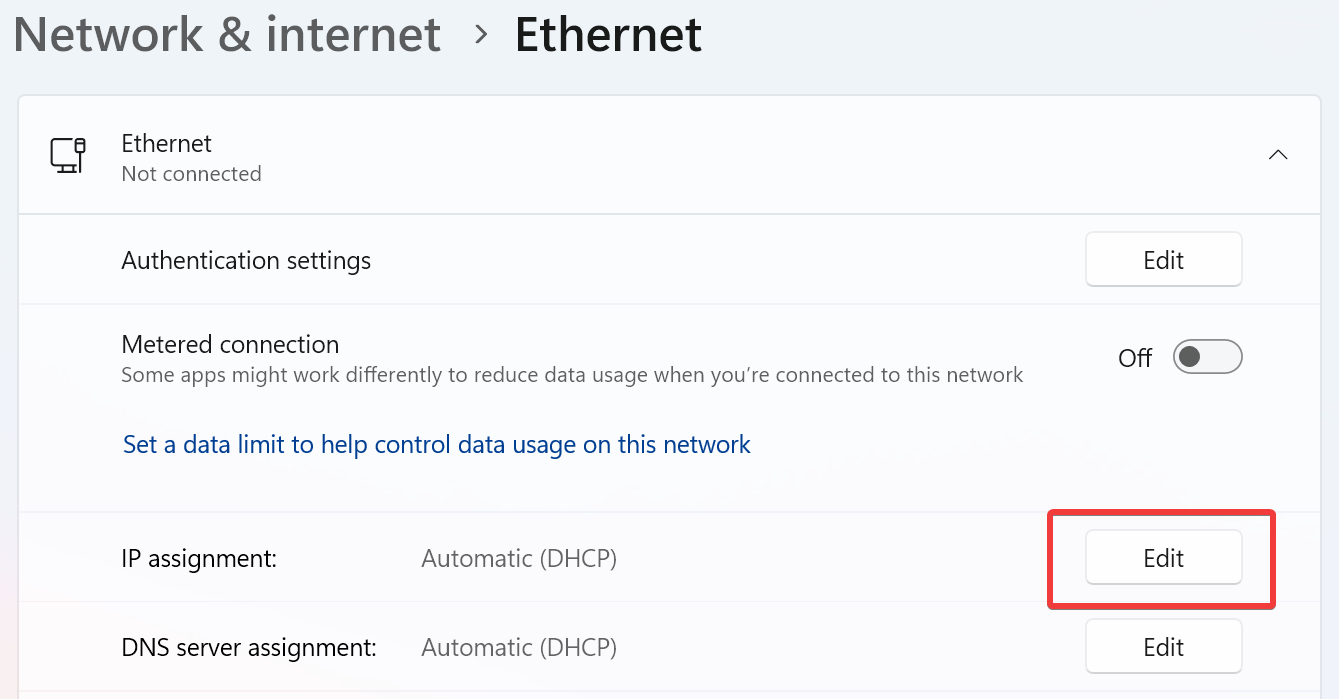
1. Navigate through Settings → Network & Internet → Ethernet
2. Click your Ethernet adapter → Edit next to the IP assignment:
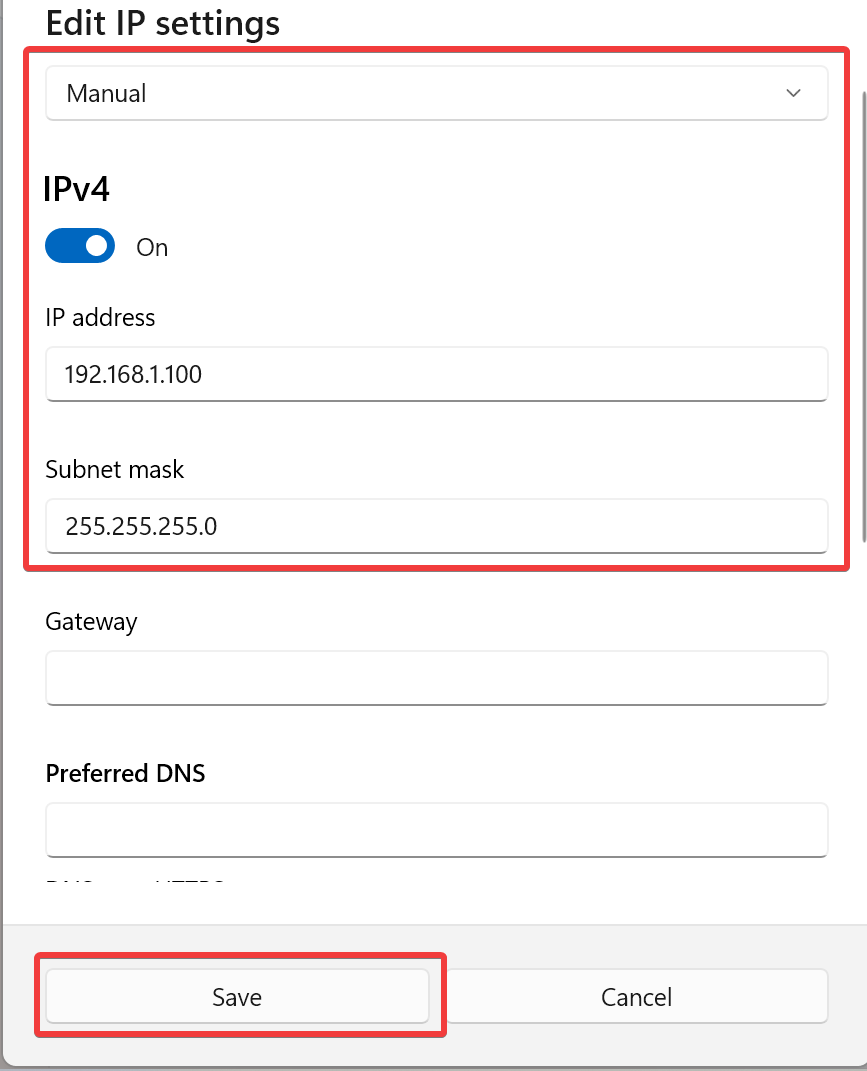
3. Switch to Manual, toggle IPv4 on, and set:
- IP address:
192.168.1.100 - Subnet mask:
255.255.255.0 - Gateway: Leave blank
4. Click Save:
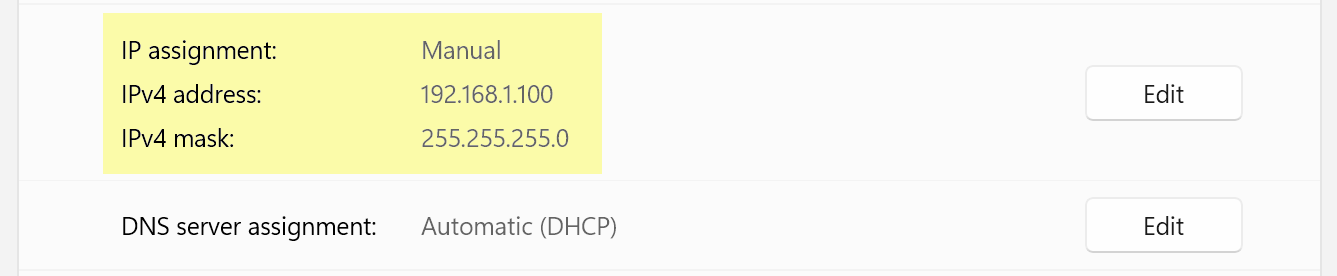
5. Confirm that Manual IP has been properly set as below:
3. Start Carbon 30
You are now ready to start your Carbon 30 sensor and begin collecting point cloud data.
Double-click voyant_visualizer.exe to launch the Voyant Visualizer.
💡 For a reliable stream, set your host to Best Performance power mode before connecting — a lowered CPU clock can cause dropped data. See Power mode.
Next, see the Verify Sensor Connection page for information on connecting to your Carbon 30 sensor and streaming data.